There are some super cool ways for displaying playing cards. Some very fine accessories are available for this, such as the popular carat case.
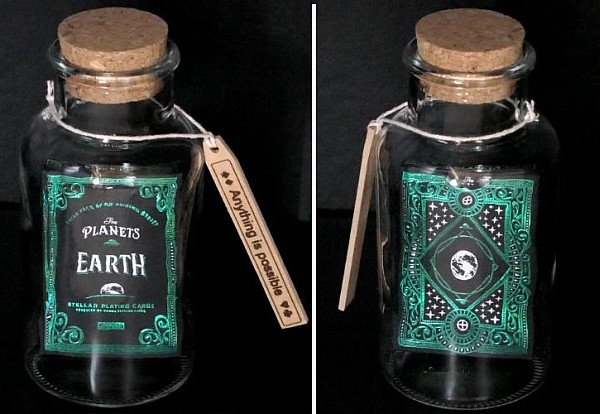
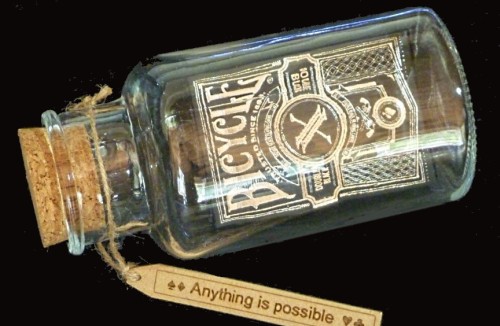
But my personal favourite is something so special, that I can’t even touch the cards. It’s called an impossible bottle, and it looks just like this:
Mine was given to me as a gift by a person who makes these. It’s a prized item in my collection, even though I can’t even get at the cards inside. After all, they’re completely encased in glass, and the neck of the bottle is literally too narrow to get them out, without making a total wreck of the tuck box and of the playing cards. I suppose I could put a sign on it that says “break glass in case of emergency” in case I’m ever get shuffling withdrawal symptoms and need to get a deck into my hands in a hurry. But quite honestly, I’d rather have this deck on display permanently, even though I know I’ll never touch those cards again.
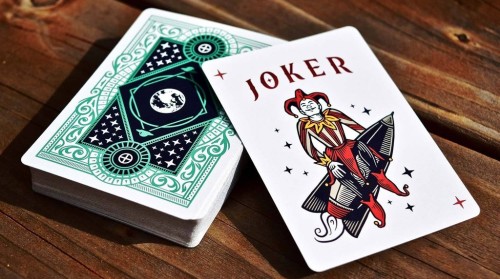
So is this really possible? Well you can see for yourself what it says on the tag: “Anything is Possible“. The fact is that the deck is inside. You’ll have to take my word for it, but I can assure you that the deck genuinely has all 52 cards inside. My deck is even still sealed close with its custom seal. Some of these impossible bottles also come with the deck in shrink-wrap. This fantastic eye-catching souvenir is the ideal gift for the playing card enthusiast, and it’s enough to make your head explode! How on earth is this outcome possible? Or in the case of the Earth deck, how literally did Earth get in?
I’m here to tell you the secret. Now I realize that the ability to make an impossible bottle is a rare skill. Only a handful of craftsman around the globe know how to make these things, and the method they use is a closely guarded secret. But I’ve been thinking about this very carefully, and I have come up with several ways in which this paradox can be accomplished. Feel free to try any or all of these methods – but at your own risk!
Method 1: Insert the deck. That’s right, just totally ignore the fact that the neck is too small for the tuck box and for the cards. Just put the deck straight into the bottle anyway. This is by far the simplest and easiest method, although it won’t work for everyone. The effectiveness of this technique will depend on the unique combination of gravity and the rotational pull of the earth where you live.
Method 2: High speed. Are you sceptical about the first method? Well then here’s the answer for you: just add speed. In other words, just shove that deck through the neck, straight into the bottle. Do it fast. Really, really, really fast. And then wham, suddenly the deck will be inside the bottle, good as new!
Method 3: Use water. When you make paper wet, it gets soggy and can change shape. So first you need to soak the deck in water for a long time until it’s soft and malleable. Distilled water seems to work best, because there’s no point in adding other chemicals to mess with things. When the deck is soft and malleable, squeeze and contort it into whatever shape is necessary to get it through the neck. Apply force if necessary, and don’t worry about what it will look like on the other side. Once you’ve done this, now you just need to let it dry and get it back to its original shape. That’s the easy part, so I’ll leave that to you, and don’t need to go into details for that.
Method 4: Molten glass. Who said that the deck has to go inside the bottle? Why not just build the bottle around the deck instead – that’s much easier. The process here is very simple. Just start with two halves of a glass bottle, and apply heat to fuse them together. I’ve found that an oxy-acetylene torch works well for this purpose. You just have to be a bit careful that you don’t incinerate the whole deck in the process. And it will take some practice to master this technique, and you can expect to “burn” through a few decks (literally) before you’re able to restore the glass so it looks like it was never in two parts to begin with.
Method 5: Shrinking glass. With this method, you start with a much larger glass bottle, one that has a neck that the deck easily fits through. After the deck is inside the bottle, simply shrink the bottle around the deck. I’ve found that a microwave can work quite well to accomplish this, but it only seems to work if you reverse the power supply first, and live in a country with a minimum of a 240V power supply with semi-alternating current. One glitch that can happen with this method is that the deck itself sometimes shrinks as well. In this case you end up with a mini-deck in a bottle, which doesn’t look nearly as impressive.
Method 6: Power of the mind. Many people will tell you that human limitations are just a matter of the mind, and they’re right. Real limitations don’t actually exist, so there’s no need to stick to them. Simply convince yourself that the ability to pass one object through another is merely an artificial and arbitrary mental limit, imposed on you from childhood, through learned behaviour. It’s time to ignore that limitation, and believe that it’s really possible to pass one object through another. Once you’re a complete believer, then you can totally do it.
Method 7: Illusion. Another method is actually not to use any deck at all. Using mirrors, and tiny lasers powered by near-invisible batteries drilled onto the inside of the cork lid, you create the holographic illusion that there is a deck inside the bottle. This makes use of total internal reflection and refraction techniques that were recently pioneered by scientists in Russia, so you’ll need some knowledge of physics (knowledge of the Russian language also helps, to help following the instructions). With the right supplies, the illusion is extremely convincing, even when viewed from different angles. The real challenge is to also give the illusion of weight inside the bottle, but I don’t want to give away everything, and I’m sure you’ll easily figure out that part for yourself.
Method 8: Internal manufacturing. Instead of making and printing the deck outside the bottle, simply do the entire manufacturing process inside the bottle. It’s quite easy really, and you just need the right equipment, but you shouldn’t have too much trouble finding what you need on eBay. You just start with raw paper pulp, and press it into thin rectangular strips of card, print the cards, and wrap a tuck box around it. The real challenge with this method is to get both sides of the cards printed evenly, because often the borders get misaligned. It can also be quite challenging to add embossing or foil to the tuck box using this technique.
Method 9: Pure magic. I saw this done in a Harry Potter movie, so I’m pretty confident it should work as a reliable method with playing cards too. Start with a bottle containing another impossible object, like a ship. You should be able to buy a ship in a bottle quite cheaply on eBay. Then it’s a simple matter to cast a spell on the ship, and turn it into a deck of cards. Voila, like magic, you now have an impossible bottle with a deck of cards inside! Of course if you don’t say the right words, there is a chance the ship might turn into your pet dog Rex instead – which can be annoying, because not all dog biscuits fit through the neck of the bottle. So do be careful if you try this method, lest the ship turn into something dangerous or undesired, or lest you turn a family member into a deck of cards by mistake.
Method 10: Cut-and-Restore. Even if you don’t believe in real magic, there are lots of ways to cut and restore objects. Magicians do this all the time with rope, for example, and we all know that it’s just a trick. It looks like magic, but in fact what actually happens is that they just cut something and then restore it again with secret knots or special glues. You can apply the same technique to a deck of playing cards. You simply cut the deck into tiny cube shaped pieces, ideally equal in size. You then carefully super-glue them back together inside the bottle. Just be sure to put them together in the right configuration, because it can be embarrassing to put a front piece of a deck onto the back by mistake, naturally making the whole method rather obvious to everyone.
Method 11: Electromagnetism. This method does require some equipment that not everyone will have available. You also need to use paper stock with magnetic qualities, and that requires a deck printed in a factory that uses electro-aligned magnetic rollers. This manufacturing process is used by select printers, but not by the United States Playing Card Company, due to strict US laws governing imports. But with this method, you use powerful electromagnets on both sides of the deck, in a bilateral configuration in order to compress the deck, making it much smaller than it really is. With the deck now in a mini-size, it is an easy matter to put it into the bottle. Then you turn off the electromagnets, and the deck returns to its regular size. Presto – deck inside bottle!
Method 12: Cheap deck. Another way to make an impossible bottle is to start with a very cheap deck nicely inside a bottle, tuck box and all. You then glue thin layers of paper onto the tuck box, to make it look like it’s actually a much higher end tuck box. The only thing that I don’t really like about this method is that it makes you feel dirty inside. In your heart of hearts you know that the deck inside the bottle is really just a wolf in sheep’s clothing, and so true craftsmen frown on this technique. Basically if you use this method, you can’t expect to sleep with a clear conscience at night. ,
Method 13: Cheat. I actually haven’t figured out this last method entirely yet, but apparently it involves cheating somehow. And I’m not good at cheating, as everyone who plays card games with me knows. Maybe I should just stick to playing card games instead of making impossible bottles? At any rate, I’ll have to leave you to figure out the other parts of this method yourself.
Well, I think I’ve given you enough ideas for you to get started with making your own impossible bottle. Of course if you’re lazy, just buy one for yourself. Or better yet, be like me, and find a friend or relative willing to make or buy you one!
Where to get them? An impossible bottle like mine doesn’t come cheap, but they are available from BuyWorthy here (note: we have no affiliation with them).
About the writer: EndersGame is a well-known reviewer of board games and playing cards. He loves card games, card magic, and collecting playing cards. This article first appeared on PlayingCardDecks.com here.
● Official Shuffled Ink website: ShuffledInk
● Make Your Own Custom Playing Cards at: ShuffledInk
● Make Your Own Custom Card Games at: ShuffledInk


